Sunday 27 February 2011

Lelo Design - Opkikkertje


Hallo! Vandaag heb ik dit opkikker kaartje gemaakt met deze lieve kikker van Lelo design. Ik heb de kikker ingekleurd met mijn potloden en het leek me leuk om hem een marine t-shirtje te geven. Zijn ogen heb ik gekleurd met een zwarte fineliner en op de kroon heb ik met een clear spica glitter pen gekleurd. Ik heb de afbeelding daarna uitgesneden en geëmbost met de cirkel nestabilities. Als basis heb ik een witte vierkante kaart genomen. Langs de randen heb ik een stiklijntje gemaakt met een stabilo fineliner. Op de kaart heb ik donkerblauw gestreept papier geplakt en daar heb ik een lintje omheen gebonden. De tekst heb ik op de computer gemaakt en die heb ik uitgeponst met de stampin up wrd window punch.

Hello! Today I made this get well card with this very cute little frog from Lelo design. I have coloured the frog with my pencils and I gave hime the marine look on his t-shirt. His eyes are coloured with a black fineliner and I coloured the crown with a clear spica glitter pen. I have cut the image out and embossed it with the circle nestabilities. As my base I used a white card. I added the faux stitching with a black fineliner. On the card I adhered blue striped paper and wrapped a ribbon around it. The sentiment was printed and I punched it with the word window punch from Stampin up.

*******************************************************************
IMAGE: Fröschlein from Lelo design.PAPER: White cs
INK: Versafine onyx black
ACCESSORIES: Pencils, black and dark blue fineliner, circle nestabilities, white ribbon, clear spica glitter pen, stampin up word window punch.

Saturday 26 February 2011

Sketch for you to try - Hoppy easter


Hallo, dit kaartje heb ik dit weekend gemaakt voor de sketch challenge van Jen del Muro. Op mijn kaartje heb ik een afbeelding van Stampfairy gebruikt, namelijk Clementine easter. Ik heb de afbeelding ingekleurd met mijn potloden en de ogen en neus van Clementine heb ik gekleurd met een zwarte glaze pen. Op de wangen van Clementine heb ik stipjes getekend met een witte gelpen. Ik heb onder de afbeelding geel stipjespapier geplakt. Langs de randen van dit vlak en ook alle andere onderdelen van de kaart heb ik stiklijntjes gezet met een zwarte fineliner. Het gele ricrac randje heb ik gemaakt met een die van Papertrey Ink. Deze heb ik gekregen van mijn lieve vriendin Angela en ik vind hem zo mooi! Het knoopje is van Elzybells en ik heb er gele bakerstwine (die ook van Angela heb gehad! :) ) doorheen gedaan. Van het bakerstwine heb ik ook een strikje gemaakt waar ik de knoop op heb geplakt. De tekst is gemaakt met het phoebe alfabet van quickutz.

Hello, I made this card this weekend for the sketch challenge from Jen del Muro. I used an image from Stampfairy on my card: Clementine easter. I have coloured the image with my pencils and her eyes and nose are coloured with a black glaze pen. I used a white gelpen to add the dots on her cheeks. I added a layer of yellow dotted paper under the image. I made the faux stitching with a black fineliner on all the layers and on the ricrac border. I made the ricrac border with a die from Papertrey ink that I got from my very sweet friend Angela. I added a button from Elzybells. Under the button I placed a bow that I made with yellow bakerstwine (that I also got from Angela :) ). The sentiment was made with the phoebe alphabet from quickutz.

****************************************************************
IMAGE: Clementine easter from StampfairyPAPER: Yellow and white cs with linen structure. black cs
ACCESSORIES: Pencils, black glaze pen, white gelpen, black fineliner, ricrac die from Papertrey ink. yellow bakerstwine, white button from Elzybells, phoebe alphabet from quickutz.

Friday 25 February 2011

Bellarific friday


Goedemorgen, ook deze week heb ik weer een kaartje gemaakt voor Bellarific friday, de challenge van Stamping Bella. Deze week moest je een stempel gebruiken die je nog nooit eerder had gebruikt. En dat was niet zo moeilijk want deze stempels zijn gloednieuw. :) Het is één van de nieuwe pixies die Christy Croll heeft getekend voor Stamping Bella. Ik heb mijn pixie ingekleurd met potloden en haar ogen zijn gekleurd met een zwarte glaze pen. Rondom de afbeelding en op de vleugeltjes heb ik gekleurd met stickles. Daarna heb ik de afbeelding uitgesneden en geëmbost met de vierkante nestabilities. De scallop kaart heb ik kant en klaar gekocht en daarop heb ik het sterretjes papier van Pipoos geplakt.  Op het sterrenpapier heb ik een kader gemaakt van wit lint en in de hoeken heb ik strikjes geplakt. De tekst is van My favorite things. Deze kaart is gepubliceerd in de Hobbyjournaal 72.

Good morning, this week I made another card for Bellarific friday, the challenge from Stamping Bella. This week you have to use a stamp that never has been inked before. And that was really easy, because this stamp is a new one. :) It is one of the new cute pixies that Christy Croll has drawn for Stamping Bella. I have coloured my pixie with pencils and for the eyes I used a black glaze pen. I added stickles on her wings and all around her. Then I cut and embossed the image with the square nestabilities. I used a white scallop card for the base  and added a layer of the cute star paper. On the star paper I added a  frame that I made with white ribbon. The sentiment is from My favorite things. In the corners I adhered 4 little bows. This card is published in the dutch magazine Hobbyjournaal 72.

*************************************************
IMAGE: The pixies set A (Parker, Persephone, Portia and Priscilla) from Stamping Bella, Essential sentiments from My favorite things.
PAPER:  5" by 5" scalloped white cards and envelopes from Craft UK limited, star paper from Pipoos
INK: Versafine onyx  black
ACCESSORIES: Pencils, black glaze pen, white ribbon, star dust stickles, square nestabilities.

Tuesday 22 February 2011

Tiddly Inks challenge - Shaker cards


Goedemorgen, het is weer dinsdag en dus is het weer tijd voor een nieuwe challenge van Tiddly Inks. Deze week willen we graag shaker cards oftewel schudkaarten zien. Als je niet weet hoe je een schudkaart moet maken, is het geen probleem, want Meredith heeft een geweldige tutorial geschreven en die kan je vinden op het Tiddly Inks challenge blog. Ik heb voor mijn schudkaart de geweldige afbeelding Wild thing cat gebruikt. Ik heb van een verpakking het plastic bewaard en dat heb ik gebruikt voor mijn kaartje. De kat is ingekleurd met potloden. Het hartjes design papier heb ik vorige week bij Scrapdelight gekocht. Het is Crush love van Bo Bunny. Ik heb met mijn nestabilities een cirkel uit het design papier gesneden en daar kon precies de plastic cirkel doorheen. De hartjes zijn van prinses Lilifee en die zijn eigenlijk bedoeld om je muffins mee te versieren, maar je kunt er dus ook heel goed een schudkaart mee maken. :) Rondom de afbeelding en langs de randen van het design papier heb ik een streepjeslijn gezet met een zwarte fineliner. De tekst is een stempeltje van My favorite things en die heb ik geponst met de Stampin up word window punch. De bloemetjes zijn gemaakt met de retro bloemen ponsen van EK success. In het midden van de bloemen heb ik een zwarte cabochon geplakt.

Good morning, iit is Tuesday again and we have a new Tiddly Inks challenge for you. This week we want to see shaker cards. If you don't know how to make them, please go to the Tiddly Inks challenge blog, because Meredith wrote an fabulous tutorial for you. I used the amazing image Wild thing cat on my card. I saved the plastic from a package to make my shaker card. The cat is coloured with pencils. The hearts design paper is  Crush love from Bo Bunny. I cut a circle in it with my nestabilities and added my plastic circle. The little hearts are from princess Lilifee and they are actually for the decoration of cupcakes, but you can also use them for your shaker cards. :) I added  faux stitching with a black fineliner. The sentiment is a stamp from My favorite things and I punched it with the word window punch from Stampin up. The flowers are made with the retro flower punches from EK Success and I added black cabochons to them.

**********************************************************************
IMAGE: Wild thing cat from Tiddly Inks, Essential sentiments from My favorite things.
PAPER: Crush love from Bo Bunny
INK: Versafine onyx black
ACCESSORIES: Pencils, Princess Lilifee muffin decoration, circle nestbilities, black fineliner, retro flower punches from EK Success, stampin up word window punch, black cabochons.

Monday 21 February 2011

Less is more - Spring


Hallo! Gisteren ben ik aan dit kaartje begonnen voor de derde challenge van het Less is more blog. Deze week moet je een CAS lente kaartje maken. Ik wist meteen al welke bloem ik op mijn kaartje wilde gebruiken, namelijk deze hele mooi narcis van Sketching stamper Digi stamps. Ik heb de narcis samen met de tekst op mijn kaart geprint en daarna de narcis ingekleurd met potloden. Daarna heb ik de lijntje rondom de afbeelding geëmbost.

Hello! Yesterday I started working on this card for the thirth challenge from the Less is more challenge blog. This week you have to make a CAS spring card. I immediately knew which flower I wanted to used on my card, the daffodil stem from Sketching stamper Digi stamps. I printed the daffodil and the sentiment (congratulations) on my card and coloured the flower with my pencils. Then I embossed the lines on the card.

**************************************************************************
IMAGE: Daffodil stem from Sketching stamper digi stamps
PAPER: White cs
ACCESSORIES: Pencils.

Sunday 20 February 2011

Stampfairy challenge - Basically white with a touch of colour


Hallo! Vorige week heb ik de eerste prijs gewonnen bij de challenge van Stampfairy en toen mocht ik 3 nieuwe afbeelding uitkiezen. Dit is één van de nieuwe afbeeldingen en daarmee heb ik een kaartje gemaakt voor de Stampfairy challenge van deze week. Deze week is het de bedoeling om een voornamelijk witte kaart te maken met een beetje kleur. Ik heb op de kaart niet veel kleur gebruikt, maar ik heb wel voor een heel opvallende kleur gekozen, namelijk knaloranje. De afbeelding die ik heb gebruikt is van de Clementine Carrots serie. Ik heb de afbeelding ingekleurd met mijn potloden. De oogjes van Clementine zijn gekleurd met een zwarte glaze pen. Het is helaas niet te zien op de foto, maar ik heb Clementine in 3d uitgewerkt. Ik heb de afbeelding op een cirkel geplakt die is uitgesneden met de nestabilities. Langs de rand van de cirkel en de kaart heb ik een stiklijntje gemaakt met een zwarte fineliner. Het oranje baker's twine was een cadeautje van mijn vriendin Angela en dat paste perfect bij mijn kaart. Ik heb er een strikje mee gemaakt en aan de uiteinden heb ik een worteltje geplakt. Het worteltje is een freebie van Stampfairy en die kan je hier vinden.  Het tekststempeltje is van Inkadinkado en komt uit het setje Birthdays are....

Hello! Last week I won the first price with my card for the Stampfairy challenge and got 3 new digital stamps from Stampfairy. This is one of my new images and I made a card with it for the new Stampfairy challenge from this week. This week you have to make a card that is basically white with a little touch of colour. I didn't use much colour, but the colour orange I used is very bright. The image is one  of the Clementine carrots images. I colured it with pencils and the eyes and nose are coloured with a black glaze pen. I 3d'd the image a little bit, but that is not visible on my picture. I adhered the image on a circle that I made with the circle nestabilities. I doodled on the edge of the circle and the card with a black fineliner. The orange baker's twine is a present from my sweet friend Angela and it was perfect for my card! I made a little bow with it and I attached carrots on the ends of the twine. The carrot is a freebie from Stampfairy and you can find it here. The sentiment is from Inkadinkado from the stampset Birthdays are .....................

*******************************************************************
IMAGE: Clementine carrots and carrot from Stampfairy, Birthdays are ...... from Inkadinkado.
PAPER: White and orange cs.
INK: Versafine onyx black
ACCESSORIES: Pencils, black glaze pen, black fineliner, circle nestabilities, orange bakers twine.

Friday 18 February 2011

Bellarific friday - Sketch with Annie


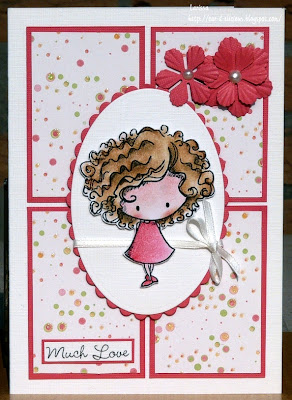
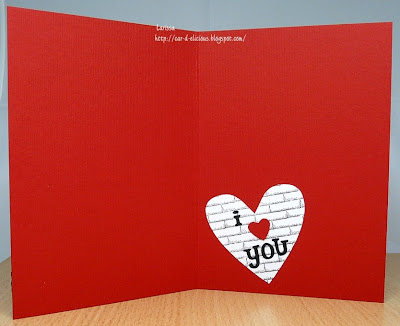
Hallo! Ik had deze week weer eens zin om mee te doen aan de challenge van Stamping Bella en deze week hadden ze een geweldige sketch op Bellarific friday. Op mijn kaartje heb ik Annie gebruikt. Zij komt uit de nieuwe serie van de Pixies die Christy Croll voor Stamping Bella heeft getekend. Is het geen schatje? Ik heb Annie ingekleurd met potloden en haar ogen heb ik gekleurd met een zwarte glaze pen. Ik heb haar uitgeknipt en op een ovaal geplakt die ik heb gemaakt met mijn nestabilities. Rondom de ovaal heb ik een lintje geknoopt. Het design papier dat ik heb gebruikt is van Die cuts with a view van de serie Nana's nursery. De tekst is een stempeltje van My favorite things. De rose bloemetjes zijn gemaakt met de floral punches 1 van Nellie Snellen. In het midden van de bloemen heb ik een pareltje gemaakt met een perlen pen.

Hello! I wanted to join the challenge from Stamping Bella and this week they have a fabulous sketch on Bellarific friday. I used Annie on my card. She is one of the new Pixies that Christy Croll has drawn for Stamping Bella. Isn't she a cutie? I have coloured Annie with my pencils and her eyes are coloured with a black glaze pen. I cut her out and attached her on an oval that I cut out with my nestabilities. I wrapped a ribbon around the oval. I used design paper from Die cuts with a view from the Nana's nursery collection. The sentiment is from My favorite things. The pink flowers are made with the floral punches 1 from Nellie Snellen. I added a pearl that I made with a perlen pen.

****************************************************
IMAGE: Arthur and Annie from Stamping Bella, Essential sentiments from My favorite things.
PAPER: Nana's nursery from Die cuts with a view, pink lemonade cs from Elzybells
INK: Versafine onyx black
ACCESSORIES:  Pencils, black glaze pen, oval nestabilities, ribbon, floral punches 1 from Nellie Snellen, perlen pen.

Wednesday 16 February 2011

Verjaardagskaartje voor Nadine


Hallo. Ik schreef vorige week al dat ik een aantal kaartjes moest maken voor mijn tante en dit is er ook één van. Dit kaartje is voor Nadine en dit prinsesje van de Digistamp boutique vond ik perfect voor op haar kaartje. Ik heb de afbeelding gekleurd met mijn potloden en ik heb een zwarte glaze pen gebruikt om haar ogen te kleuren. Op haar vleugels, staf en kroontje heb ik glitter aangebracht. Ik heb de afbeelding uitgeknipt. Met de nestabilities labels one heb ik het label gemaakt en daarna heb ik het geëmbost met de hartjesembossingfolder van Provocraft. De witte strip is geponst met de scalloped sentiment punch van fiskars. Ik heb er een towutje omheen gebonden en aan het strikje heb ik een tagje gehangen met een ringetje. De tekst op het label is geprint en ik heb eromheen gedoodled met een fineliner. De naam Nadine is gemaakt met het Phoebe alfabet van quickutz

Hello, this is another card that I made for my aunt. This card is for Nadine and I thought the little princess from the Digistamp boutique would be perfect for her. I have coloured the image with my pencils and I coloured her eyes with a black glaze pen. On her wings and crown I added glitter. I have used the nestabilities labels one for the label and I embossed it with the hearts embossingfolder from Provocraft. The white strip of paper is punched with the scalloped sentiment punch from Fiskars. I wrapped a cord around it. I attached a little tag to the bow with a ring. The sentiment was printed and I doodled a bit on the tag with a fineliner. The name Nadine is made with the phoebe alphabet from quikutz.

**************************************************
IMAGE: Fairy Tallulah from the Digistamp boutiquePAPER: Starry paper from Pipoos
ACCESSORIES: Pencils. black glaze pen, Love language set from Provocraft, scalloepd sentiment punch from Fiskars, white cord, scalloped tag from Martha stewart, fineliner, phoebe alphabet from quickutz, ring, nestabilities labels one.

Monday 14 February 2011

Tiddly Inks - Chocoladereep


Hallo! Dit is mijn laatste valentijns creatie van dit jaar en ik heb hem gemaakt nadat ik bij Carrie iets soort gelijks had gezien. Zo'n leuk idee! Ik vond de snoephouder zo leuk dat ik heb besloten om er één te maken voor een klein chocolade reepje. De schattige afbeelding die ik heb gebruikt is Dr Love boto van Tiddly Inks. Ik heb de robot ingekleurd met potloden en met een zwarte glaze pen heb ik zijn hartjesogen nog eens overgetrokken net als alle schroefjes. Ik heb de afbeelding uitgeknipt. Ik heb uit een groot vel rood karton een lange strip gesneden en die heb ik gevouwen. Ik heb zwart ruitjes op de bovenkant en binnenin geplakt. Met het Moxie alfabet van quickutz heb ik de tekst gemaakt. Het hartje is geponst en ik heb het bevestigd met een witte brad. Ik heb hem zodanig geplaatst dat de bovenflap achter het hartje gehangen kan worden.

Hello! This is my last valentine's creation this year and I made it after I saw something like this on Carrie's blog. Such a great idea! I really loved the candy holder and decided to make something like this for some chocolate. The very cute image I used is Dr Love boto from Tiddly Inks. I coloured him with my pencils and I used a black glaze pen to colour his heart eyes and also all the screws. I have cut the image out. I cut a long strip of red cardstock and folded it. I added some black design paper on top of it and on the inside of the candyholder. I made the sentiment with the moxie alphabet from quickutz. The heart is made with a punch and I adhered it with a white brad. The flap of the front of the candyholder can be placed behind it, so the candyholder stays closed.
 

Hier een zijaanzicht.

This is a view from the side.


Ik heb met de word window punch een gat gemaakt waar de chocoladereep precies doorheen kan. Binnenin heb ik de I nog een geplaatst zodat de tekst ook hier compleet is. Ik heb de afbeelding verkleind en nog eens gekleurd. Ik heb de afbeelding geponst met de hartjes pons en op zwar papier geplakt. Daarna heb ik de afbeelding uitgeknipt met een zwart randje eraan.

I made a hole with the word window punch with the exact size of the chocolate bar. I added another I so the sentiment is also complete on the inside of the card. I made the image smaller and coloured it again. I puned t out with a heart punch and adhered it on black paper. I cut the heart out and placed it on the inside of the candy holder.

*********************************************************************
IMAGE: Dr love boto from Tiddly Inks
PAPER: Red cs from V&D.
ACCESSORIES: Pencils, black glaze pen, heart punch, word window punch from Stampin up, white brad, moxie alphabet from quickutz.

Sunday 13 February 2011

Stampfairy en Tuesday morning sketches challenge.

Dit is mijn tweede berichtje van vandaag. Onder deze post staat mijn valentijnskaart voor het Nederlanse magnolia challenge blog.

This is my second post of today. Under this post you will find my valentine's card for the Dutch magnolia challenge blog.


Ik had deze lieve beer van Stampfairy al eerder deze week geprint en gekleurd en ik wilde er vandaag nog heel graag een kaartje mee maken. Met deze kaart wil ik meteen meedoen aan twee challenges, ik heb namelijk de sketch van het Tuesday morning sketches blog gevolgd en bij de Stampfairy challenge willen ze graag hartjes en kant op je kaart zien, maar je mag geen roze of rood op je kaartje gebruiken. Ik heb mijn beer gekleurd met prisma en derwent potloden. De oegen en neus van de beer heb ik gekleurd met de zwarte glaze pen. Op zijn voelsprieten heb ik gekleurd met een pitch black spica glitter pen en de vleugeltjes heb ik gekleurd met de clear spica glitter pen. Ik heb de beer uitgeknipt en met foamtape op de kaart geplakt. Ik heb onder de beer een vlak geel gestreept papier geplakt en daarop heb ik eerst de tekst geprint. Om het vlak heb ik een zwart lintje gespannen en uit zwart papier heb ik met een stansje van magnolia een stukje kant gemaakt. Dit heb ik onder lint opgeplakt. Uit geel stipjespapier heb ik 4 grote bloemen geponst met een retro bloemenpons van EK Sucess. De blaadjes van de bloemen heb ik omgekruld met een penseeltje en in het midden van de bloemetjes heb ik een zwart hotfix hartje geplakt. 

I had printed and coloured this very sweet bear from Stampfairy earlier this week and I really wanted to make a card with it today. I want to enter this card in two challenges, I followed the lovely sketch from the Tuesday morning sketches blog and at the Stampfairy challenge blog they are asking for lace and hearts, but you are not allowed to use red or pink on your card. I have coloured my bear with prisma and derwent pencils. The eyes and nose are coloured with a black glaze pen. I coloured the antenna's with e pitch black glaze pen and the wings are coloured with a clear spica glitter pen. I have cut the bear out and used foamtape to adhere it on the card. I used a piece of yellow striped paper and printed my sentiment on it. I wrapped a black ribbon around it and used a magnolia die to cut the little piece of lace. I adhered the lace under the ribbon. I punched 4 large flowers out of yellow dotted paper with a retro flower punch from EK Success. I used a paint brush to curl the leaves of the flower and in the middle of the flowers I added 4 black heart hotfix stones.

*********************************************************
IMAGE: Lenny bee from Stampfairy
PAPER: Yellow cs with linen structure, black cs.
ACCESSORIES:  Derwent and prisma pencils, black glaze pen, white gelpen, pitch black and clear spica glitter pen, black ribbon, magnolia doo-hickey, retro flowerpunch from EK Success, heart hotfix.

Nederlandse magnolia challenge blog - Valentijn


Goedemiddag! Ik heb vanochtend dit kaartje gemaakt voor de Valentijns challenge van het Nederlandse Magnolia challenge blog. Ik heb weer een nieuwe stempel uit de You are so special collectie gebruikt. Dit is Tilda with heart lace en ik heb haar ingekleurd met derwent en prisma potloden. Haar ogen zijn gekleurd met een zwarte glaze pen en op haar wangen heb ik stipjes gemaakt met een witte gelpen. Ik heb de afbeelding uitgeknipt wat heel erg lastig was met het slingertje en ik heb haar met foamtape op de kaart geplakt. Ik heb een witte kaart gebruikt en van de voorkant heb ik een reepje afgesneden en daar heb ik rose papier onder geplakt dat geponst is met de scalloped sentiment pons van Fiskars. De tekst is rechtstreeks op de kaart geprint. De kaart is geëmbost met een embossingfolder van Sizzix. De bloemetjes zijn gemaakt met de retro flower ponsen en in het midden van de bloemen heb ik een zwarte cabochon geplaatst.

Hello! This morning I made this card for the Valentine's challenge from a Dutch Magnolia challenge blog. I used another new stamp from the You are so special collection from Magnolia. This is Tilda with heart lace and I coloured her with prisma and derwent pencils. Her eyes are coloured with a black glaze pen and I used a white gelpen for the dots on her cheeks. I have cut the image out, which took a long time because of her chain of hearts. I used a white card and cut a strip of the front of the card. I added a pink strip of paper that is punched with the scalloped sentiment punch from Fiskars. I printed the sentiment on my card. The card si embossed with an embossingfolder from Sizzix. The flowers are made with the retro flower punches and in the middle of the flowers I added a black hotfix.

************************************************************
IMAGE: Tilda with heart lace from Magnolia
PAPER: Bubblegum cs from Doodlebug
INK: Versafine onyx black
ACCESSORIES: Derwent and prisma pencils, black glaze pen, white gelpen, scalloped sentiment punch from Fiskars, white ribbon, sizzix embossingfolder, retro flower punches, black cabochons.

Saturday 12 February 2011

Less is more week 2 - One layer card


Hallo! Ik heb laatst een tegoedbon gewonnen van Stamping Bella en toen heb ik natuurlijk even wat mooie stempeltjes gescoord. Ik was meteen verliefd op deze beide bloemenstempels en daar heb ik vandaag deze kaartjes mee gemaakt. Met de kaarten wil ik meteen meedoen aan de tweede challenge van het nieuwe challengeblog Less is more. Op dit challengeblog staan de CAS-kaarten (clean and simple) in de hoofdrol en aangezien ik het erg leuk vind om af en toe een clean and simple kaart te maken, wilde ik erg graag meedoen. De eerste challenge heb ik helaas gemist. Deze week gaat het om een One layer kaart met daarop een bloem of boom. De bloemenstempels van Stamping Bella waren daar dan ook perfect voor. Met de stempel Flower garden heb ik een verjaardagskaartje gemaakt. Ik heb op een vierkante witte kaart eerst de tekst geprint en daarna heb ik de klaprozen ernaast gestempeld met memento inkt. De klaprozen zijn ingekleurd met potloden en daarna heb ik de onderste hoeken van de kaart afgerond met de We R Memorykeepers corner chomper.

Hello! A couple of weeks ago I won a voucher for the Stamping Bella shop, so I bought these very lovely flowerstamps. I both loved them immediately and I used them to make 2 cards today. I want to enter both cards in the second challenge of the new challenge blog Less is more. This challenge blog is totally dedicated to CAS (Clean and simple cards) and I really wanted to join the challenge. Unfortunately I missed the first challenge. This week you have to create an One layer card with a flower or tree on it. The flowerstamps from Stamping Bella are perfect for this challenge. I used a white square card and printed my sentiment (Happy birthday) on it. Then I stamped the poppies with black memento ink. The poppies are coloured with pencils and then I rounded the corners of the card with the corner chomper from We R Memorykeepers.


Voor de tweede kaart heb ik een kant en klare scallop kaart genomen en daarop heb ik de Scribble garden gestempeld. Ik heb er een vrolijk veldboeket van gemaakt en de bloemen dus ingekleurd met allerlei kleuren potloden. Ik heb geen tekst op de kaart gedaan aangezien ik ook veel verzoekjes krijg voor kaarten zonder tekst.

I used a scalloped white card for the second card and I stamped the Scribble garden on it. I used all kinds of pencils in different colours to colour all the flowers. I didn't add a sentiment because I get a lot of requests for cards without a sentiment.

*********************************************************************
IMAGE: Flower garden en scribble garden from Stamping Bella
PAPER: White cs and   5” bij 5” scalloped white cards & envelopes  van Craft UK limited
INK: Memento Tuxedo black
ACCESSORIES: Pencils, corner chomper

Friday 11 February 2011

Tiddly Inks - I love you beary much


Hallo! Dit kaartje heb ik vorige week al gemaakt met deze lieve beer van Tiddly Inks. De afbeelding is een freebie en je kunt hem hier krijgen! Ik heb hem gebruikt voor een valentijnskaartje in de niet zo traditionele kleuren. De beesr is gekleurd met prisma potloden en de ogen en neus heb ik gekleurd met een zwarte glaze pen. Ik heb de beer uitgeknipt en daarna met foamtape op de kaart geplakt. De kaart heb ik met de ronde nestabilities uit blauw karton gesneden. Ik heb een cirkel van wit karton gesneden en daarop heb ik gestempeld met de magical background stempel van Hero arts. De tekst is gemaakt met het Katie alfabet van quickutz. Ik heb met een witte gelpen accenten aangebracht op de letters.

Hello! I made this card last week with this very sweet bear from Tiddly Inks. This image ia freebie and you can get it here! I have used the image for a valentine's card and I used not so traditional colours for it. I coloured the bear with prisma pencils and his eyes and nose are coloured with a black glaze pen. I have cut the bear out and adhered him on the card with foamtape. I made the card from blue cardstock with the circle nestabilities. I also cut a circle out of white cardstock and I stamped on it with the magical background from Hero Arts. The sentiment is made with the Katie alphabet from quickutz. I used a white gelpen for some accents on the letters.

***************************************************************
IMAGE: For you from Tiddly inks. magical background from Hero Arts.
PAPER: Blue and white cs.
INK: Sirius multipad metallic
ACCESSORIES: Prisma pencils, black glaze pen, white gelpen, Katie alphabet from quickutz, circle nestabilities.

Wednesday 9 February 2011

Verjaardagskaartje voor Kyra


Goedemorgen! Mijn tante had me gevraagd om wat kaartjes te maken voor haar kleindochter en voor Kyra. Dit is het kaartje dat ik voor Kyra heb gemaakt. Het lieve beertje is een digitale stempel van Stampfairy. Er zijn in totaal 5 verschillende versies van het lieve feeën beertje Linda en ze zijn allemaal erg schattig! Ik heb rondom het beertje een tekstcirkel geplaatst met in het midden het beertje zelf. Ik heb haar ingekleurd met potloden en de oogjes zijn gekleurd met een zwarte glaze pen. Met een witte gelpen heb ik haar een stipjes jurkje gegeven! De afbeelding is uitgesneden met de cirkel nestabilities. Op mijn kaart heb ik 4 vierkanten geplakt van wit karton en hierop heb ik het kleine bloemetje gestempeld. De bloemetjes heb ik allemaal ingekleurd en daarna heb ik met een zwarte fineliner stiklijntjes rondom de afbeelding aangebracht.

Good morning! My aunt asked me to make her some birthday cards for her granddaughters and for Kyra. This is the card that I made for Kyra. The very sweet bear is an digital image from Stampfairy. There are 5 different images of Linda the fairy and they are all adorable! I added a textcircle and placed the bear in the middle of it. (the sentiment says * Happy birthday * Kyra * 3 years *) I coloured the bear with my pencils and I used a  black glaze pen on her eyes. With my white gelpen I added some dots on her dress. The image is cut out with the circle nestabilities. On my card I adhered 4 white squares and stamped on them with a flower stamp from Elzybells. I coloured them and added the faux stitching with a black fineliner.

************************************************************
IMAGE: Linda fairy from Stampfairy, Elzybells flower stamp
PAPER: Red cs
INK: Versafineonyx black
ACCESSORIES: Derwent pencils, black glaze pen, white gelpen, black fineliner, circle nestabilities.

Tuesday 8 February 2011

Tiddly Inks challenge - Love is in the air!


Goedemorgen! Vanochtend kan ik weer mijn nieuwe kaartje voor de laatste Tiddly Inks challenge laten zien. Deze week is het thema Love is in the air en het is de bedoeling om een romantisch kaartje of cadeautje te maken of allebei. Ik heb ervoor gekozen om een kaartje te maken met een bijpassend doosje waar lekker chocolade in kan. Deze week heb ik met de afbeelding Colorful world gewerkt.

Good morning! This morning I can show you my new card that I made for the latest Tiddly Inks challenge. This week the theme is Love is in the air and you have to make a romantic card or gift or both I decided to make a card  and a matching box with some chocolates. This week I used the image Colorful world


Ik heb de afbeelding geprint en daarna ingekleurd met prisma en derwent potloden. Haar ogen heb ik gekleurd met een zwarte glaze pen. Ik heb de afbeelding uitgeknipt. De bakstenen zijn gestempeld. Ik heb de stempel al jaren en helaas staat er niet op van welk merk hij is. Op het "muurtje" heb ik met het Olivia alfabet de tekst gemaakt en het hartje is uitgesneden met de Silhouette. Het strikje heb ik gemaakt met zwart en smaller wit lint. Ik heb ook nog wat zwarte hotfix steentjes gebruikt.

I have printed the image and coloured it with prisma and derwent pencils. Her eyes are coloured with a black glaze pen. I have cut the image out. I used a stamp for the wall. I have got this stamp for years and unfortunately I don't know which brand it is. On the "wall" I made the sentiment with the Olivia alphabet and the heart was cut out with the silhouette. I made the bow with black and white ribbon. I also added some black hotfix stones.


Binnenin heb ik de kaart versierd met een wit hart waar ik de bakstenen weer op heb gestempeld. Ook hier heb ik weer de tekst gemaakt met het Olivia alfabet van quickutz. Het rode hartje is gemaakt met een ponsje.

On the inside of the card I added a large white heart and I stamped the wall stamp on it. Again I used the Olivia alphabet from quickutz for the sentiment. The red heart was made with a punch.


Nog een close up van het hart.

Another close up of the heart.


Het doosje heb ik gemaakt met de Silhouette. Het model hiervoor komt uit de Silhouette shop en het heet adorable box 3 van Lori Whitlock. Het doosje heb ik gemaakt van rood karton. Bovenop het doosje heb ik een stukje wit papier geplakt dat eerst gestempeld is met de bakstenen stempel. Ik heb een stukje sheet gebruikt om het venster in de doos te sluiten.

I made the box with my silhouette. I got the template in the Silhouette shop and it is called adorable box 3 from Lori Whitlock. On top of the box I added a layer of white paper on which I stamped with the wall stamp again. I added a sheet to close the aperture in the lid of the box.


Binnenin het doosje heb ik een bodempje gemaakt met daarin 4 gaten zodat de ferrero rocher ballen niet gaan schuiven in het doosje. :) 

I made a double bottom for the inside of the box. I made 4 holes in it. That way the choccies will not move when they are in the box. :)


Ik heb de afbeelding Colorful world verkleind en daarna heb ik deze gekleurd en uitgeknipt. Ze is met foamtape op de deksel van het doosje geplakt. Daarna heb ik de deksel versierd met nog wat zwarte hotfix steentjes.

I resized the image Colorful world and coloured it again. I used foamtape to adhere it on the lid of the box. I used a couple of black hotfix stones to decorate the lid.

***************************************************************
IMAGE: Colorful world from Tiddly Inks, wall stamp from ?
PAPER: Red cs.
INK: Versafine onyx black
ACCESSORIES: Derwent and prisma pencils. black glaze pen, black and white ribbon, black hotfix, Olivia alphabet from quickutz, silhouette, sheet.

Saturday 5 February 2011

Tiddly Inks - Diane's hope


Hallo! Afgelopen week heb ik dit eenvoudige kaartje gemaakt met deze mooi orchidee die getekend is door Christy Croll van Tiddly Inks. Ik heb de orchidee gekleurd met luminance potloden. Daarna heb ik wat rose krijt rondom de afbeelding aangebracht. Ik heb de afbeelding uitgesneden met de vierkante nestabilities. Op een witte kaart heb ik papicolor papier geplakt en daar weer bovenop de afbeelding. Ik heb daarna de stiklijntjes aangebracht met een witte gelpen.

Hello! Last week I made this simple card with the very lovely orchid that Christy Croll from Tiddly Inks has drawn. I coloured the orchid with luminance pencils. Then I added some pink chalk around the image of the orchid. I have cut the image out with the square nestabilities. I adhered some papicolor paper on a white card and then I added the image. Then I added the faux stitching with a white gelpen.

*************************************************************
PAPER: Papicolor paper, dcp paper
ACCESSORIES: Luminance pencils, pink chalk, square nestabilities, white gelpen.

Wednesday 2 February 2011

Valentijns Magnolia


Hallo, gisteren ben ik aan dit valentijnskaartje begonnen. Ik vind de nieuwe stempels uit de You are so special collectie van Magnolia zo lief, dat ik het niet kon laten er een paar te kopen. Op dit kaartje heb ik Tila with many hearts gebruikt. Ik heb Tilda ingekleurd met derwent potloden. Ik wilde eens proberen hoe het eruit zou zien als ze een wit jurkje aan had en volgens mij is dat redelijk gelukt. Tilda's ogen zijn gekleurd met een zwarte glaze pen en op haar laarsjes heb ik Glossy accents aangebracht.. Alle hartjes zijn gekleurd met een clear spica glitter pen, maar dat is helaas niet te zien op de foto. Het design papier is van Making memories, namelijk Battenburg Love notes. De bloemetjes zijn gemaakt met de floral punches 1 van Nellie Snellen en ik heb er pearl glimmermist op gespoten. In het midden van de bloemen heb ik een kristallen hotfix steentje geplakt. Er staat nog geen tekst op de kaart, die stempel ik later wel binnenin.
Ik wil met deze kaart aan heel veel challenges meedoen, zo vlak voor Valentijnsdag hebben veel challenges hetzelfde thema, dus dat was redelijk makkelijk. LOL

Hello, yesterday I started working on this valentines card. I love the new stamps from the You are so special collection from Magnolia very much, so I just had to buy a couple. :) On this card I used Tilda with many hearts. I have coloured Tilda with derwent pencils. I wanted to try to give her a white dress and I think it looks ok. Tilda's eyes are coloured with a black glaze pen and I added Glossy accents on her boots. All the eharts are coloured with a clear spica glitter pen, but you can't see that on the picture. The design paper I used is from Making Memories, Battenburg love notes. The flowers are made with the floral punches 1 from Nellie Snellen. I psrayed them with pearl glimmermist. I added a chrystal hotfix stone to the middle of the flowers. I haven't added a sentiment, but I think I will add it on the inside I can find something I like.
I am entering my card in a lot of challenges, lots of challenges have a valentines theme right now, so that was pretty easy. LOL


********************************************************************
IMAGE: Tilda with many hearts from Magnolia
PAPER: Battenburg love notes from Making memories
INK: Versafine onyx black
ACCESSORIES: Derwent pencils. black glaze pen, clear spica glitter pen, Glossy accents from Ranger, Labels eight nestabilities, white ribbon, floral punches 1 from Nellie Snellen, pearl glimmermist, chrystal hotfix.

Tuesday 1 February 2011

Tiddly Inks - Kiss me, you fool!


Goedemorgen! Het is weer dinsdag en dat betekent dat her weer tijd is voor een nieuwe Tiddly Inks challenge. Deze week is de challenge Kiss me you fool. Het is de bedoeling dat je in je afbeelding of in je tekst ergens een kus verwerkt. Ik heb ervoor gekozen om de afbeelding van Donna te gebruiken, want daar vond ik deze tekst perfect bij passen! De tekst heb ik zelf geprint, maar ik heb hem overgenomen van een tekst die bij de froggie thoughts zaten. Ik heb Donna ingekleurd met mijn potloden en een zwarte glaze pen. De afbeelding is daarna utigesneden met de rechthoekige nestabilities. Het stipjes papier is van Nel van Veen. De paarse strip is geponst met de scalloped sentiment punch van Fiskars. De bloemetjes zijn gemaakt met de retro bloemenponsjes. In het midden heb ik kristallen hotfix steentjes geplakt. De sketch van mijn kaart komt van het Sketch saturday blog.

Goodmorning!. It is Tuesday again and that means we have a new Tiddly Inks challenge for you. This week the challenge is Kiss me, you fool. You have to use a kiss somewhere on your card. That can be a kiss-image or kiss in the sentiment. I have chosen to use the image of Donna, because I think the sentiment is perfect for this image. I printed the sentiment myself, but I used the text from the froggie thoughts. I have coloured Donna with my pencils and a black glaze pen and I cut it out with the rectangle nestabilities. The dotted paper is from Nel van Veen. I punched the purple paper with the scalloped sentiment punch from Fiskars. The flowers are made with the retro flower punches. I added chrystal hotfix stones to them. The lovely sketch is from the Sketch saturday blog.

**********************************************************
IMAGE: Donna from Tiddly Inks Froggie thoughts from Tiddly Inks
PAPER: Nel van Veen, papicolor, Bazzil ivy
ACCESSOIRIES: Pencils, black glaze pen, ribbon, scalloped sentimtent punch from Fiskars, retro flower punches, hotfix.

LinkWithin

Related Posts with Thumbnails